The weather app on your iPad is a handy tool for keeping track of the current weather conditions and forecasts. However, there may be instances where the app displays the wrong location, which can be quite frustrating. Fortunately, changing the weather location on your iPad is a straightforward process. In this article, we will guide you through the detailed steps to change the weather location on your iPad, as well as provide some additional tips and tricks.
Why Is the Weather App Showing the Wrong Location on iPad

Before we dive into the steps to change the weather location on your iPad, it’s essential to understand why the app might be displaying the wrong location in the first place. There are a few common reasons for this issue:
- Incorrect Location Settings: The weather app uses your device’s location services to determine your current location. If the location settings on your iPad are incorrect or not enabled, the app may display the wrong location.
- GPS Signal Issues: Sometimes, your iPad may have trouble receiving a strong GPS signal, which can lead to inaccuracies in determining your location. This can result in the weather app displaying the wrong location.
- IP-based Location: In some cases, the weather app may determine your location based on your IP address, which can be less accurate, especially if you’re using a VPN or if your IP address is associated with a different location.
Now, let’s proceed to the steps to change the weather location on your iPad.
How to Change Weather Location on iPad

To change the weather location on your iPad, follow these steps:
- Open the “Settings” app on your iPad.
- Scroll down and tap on “Privacy.”
- Tap on “Location Services.”
- Ensure that the toggle switch next to “Location Services” is turned on. If it’s enabled already, move on to the following action.
- Scroll down and find the “Weather” app in the list of installed apps.
- Tap on “Weather.”
- Select “While Using the App” to allow the weather app to access your location only while you’re actively using the app.
- Alternatively, you can choose “Always” if you prefer the weather app to have access to your location even when you’re not using it.
- Exit the Settings app, and open the Weather app on your iPad.
The weather location should now reflect your current location accurately. If it doesn’t, try closing and reopening the app or restarting your iPad.
How to Modify the Default Weather Location on an iPad by Faking Its Location
If you want to change the default weather location on your iPad to a different location, you can use iFoneTool AnyGo.
iFoneTool AnyGo is a versatile software tool designed to change the GPS location on your iOS devices, such as iPhones and iPads. With AnyGo, you can simulate your device’s GPS location to any desired place in the world, allowing you to virtually teleport yourself to different locations without physically being there. Follow these steps:
Step 1: Download and install the iFoneTool AnyGo on your computer. Open AnyGo and click the Start button.

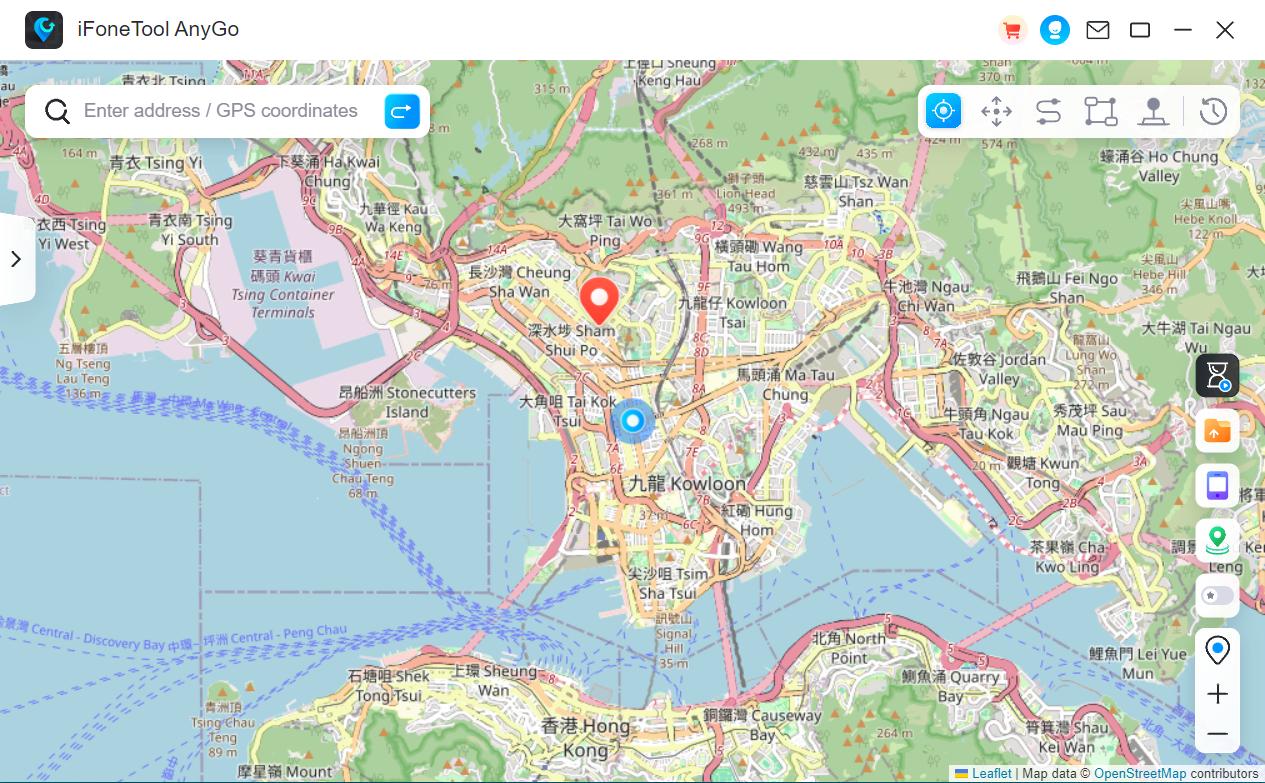
Step 2: Connect your phone to your computer by USB, and then you will see your location on the map.

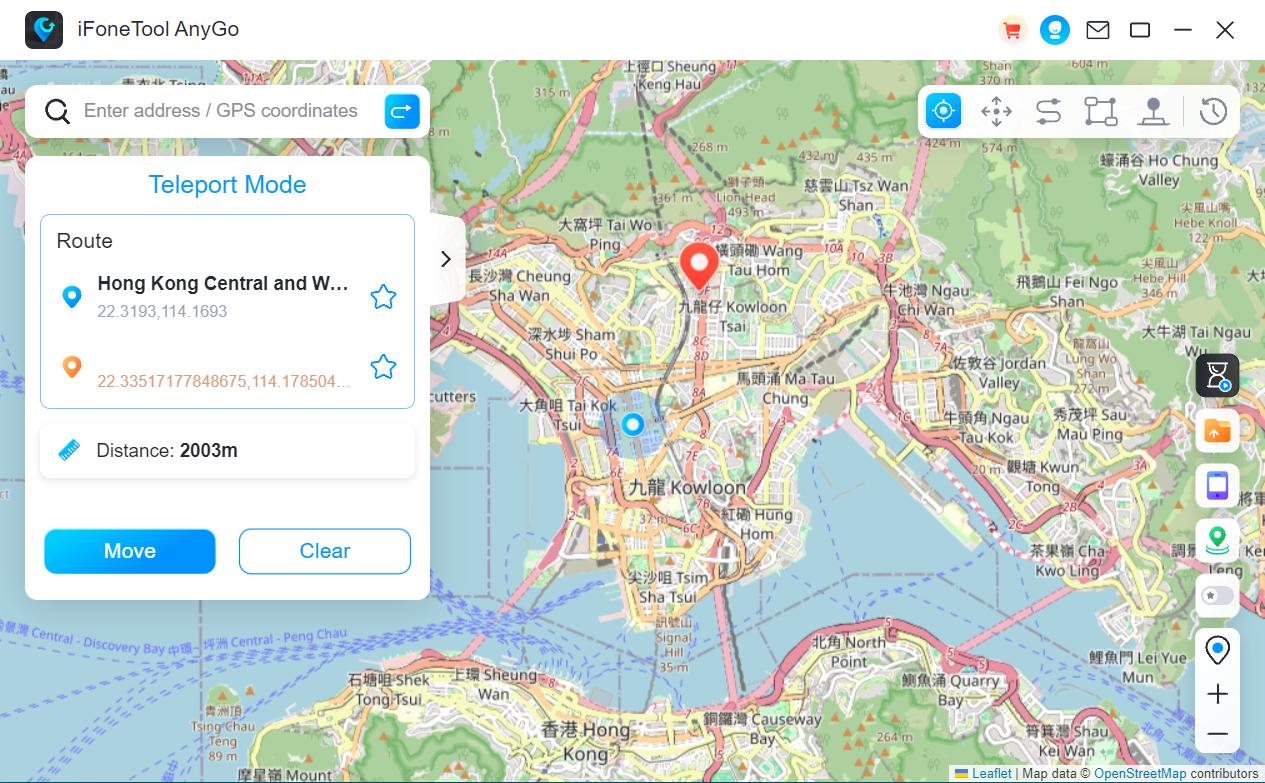
Step 3: Click the location you want to go on the map or enter where you’d like to go on the top left. And then click “Move”.

By using iFoneTool AnyGo, you can spoof your weather location on your iPad quickly.
How to Disable/Enable Location Service for Weather
If you prefer not to allow the weather app to access your location, or if you’re experiencing issues with the location accuracy, you can disable or enable location services specifically for the Weather app. Here’s how:
- Open the “Settings” app on your iPad.
- Scroll down and tap on “Privacy.”
- Tap on “Location Services.”
- Scroll down and find the “Weather” app in the list.
- Tap on “Weather.”
- Select “Never” to disable location services for the Weather app.
- Alternatively, choose “While Using the App” or “Always” to enable location services for the Weather app.
- Exit the Settings app, and open the Weather app on your iPad.
- The weather location will now be based on the selected location service setting.

Useful Tips About iPad Widget

The iPad also offers a weather widget that can be added to the home screen, providing you with quick access to the current weather conditions. Here are some useful tips about the iPad weather widget:
- Adding the Weather Widget: To add the weather widget, swipe right from the home screen to access the Today View. Scroll to the bottom, tap on “Edit,” and then tap the “+” button next to “Weather” to add the widget. After that, you can drag it up or down to change where it is.
- Customizing the Weather Widget: You can customize the weather widget to display information from a specific location. To do this, tap and hold the weather widget, and then select “Edit Widget.” From there, you can choose the location where you want to display weather information.
- Viewing Detailed Weather Information: Tapping on the weather widget will open the Weather app, allowing you to view more detailed information about the current weather conditions, hourly forecasts, and extended forecasts.
- Removing the Weather Widget: If you no longer want the weather widget on your home screen, swipe right to access the Today View, scroll to the bottom, tap on “Edit,” and then tap the “-“ button next to “Weather” to remove the widget.
Conclusion
Changing the weather location on your iPad is a simple process that can be done through the device’s settings. By ensuring that your location services are enabled and properly configured for the Weather app, you can ensure accurate weather information for your current location.
Additionally, you have the option to use location spoofing apps to change the default weather location or customize the weather widget on your iPad’s home screen. Keep in mind to use location spoofing sensibly and within the law.
Now you can enjoy the convenience of accurate weather updates on your iPad, no matter where you are.

