

Snapchat is a popular social media platform known for its interactive and fun features. One of the exciting ways to enhance your Snapchat experience is by adding a location to your posts. By sharing your location, you can let your friends know where you are and add an extra layer of fun to your snaps.
In this article, we will provide you with a step-by-step guide on how to add a location on Snapchat for both iOS and Android devices.
How to Add a Location to a Snapchat Post on the iPhone App?
If you are an iPhone user, follow these simple steps to add a location to your Snapchat post:
Step 1: Launch Snapchat on your iPhone.
Step 2: Capture a photo or video or choose one from your camera roll.
Step 3: Swipe right to access geo-filters.
Step 4: Swipe left to find the appropriate geo-filter for your location.
Step 5: Tap on the desired location to apply the filter to your photo or video.
Step 6: Adjust the size and placement of the location filter by pinching, zooming, or dragging it.
Step 7: After applying the location filter, you can share your snap with friends or post it on Snapchat.
Note: Ensure that your iPhone’s location services are turned on for Snapchat. You can do this by enabling “When Using the App” in your iPhone’s Privacy > Location Services menu.
How to Add a Location to a Snapchat Post on the Android App?
For Android users, here’s how you can add a location to your Snapchat post:
Step 1: Launch the Snapchat app on your Android phone.
Step 2: Capture a photo or video that you want to attach a location to.
Step 3: Tap on the paperclip symbol at the bottom right to add a sticker.
Step 4: Scroll down and select the “Location” sticker.
Step 5: Grant Snapchat permission to access your location when prompted.
Step 6: Choose a location from the provided list or search for a specific place.
Step 7: Adjust the size and placement of the location sticker on your snap.
Step 8: Finally, hit the send button to share your snap with the added location.
How to Enable/Disable Location Filters on Snapchat Posts?
In Snapchat, you have the option to enable or disable location filters for your posts. Here’s how you can manage them:
Step 1: Launch the Snapchat app and select the camera icon.
Step 2: Tap on the gear icon in the top-right corner to access the Settings menu.
Step 3: Scroll down and find the choice labeled “Who can…”
Step 4: To control who can view your location on the Snap Map, tap on the “See My Location” button.
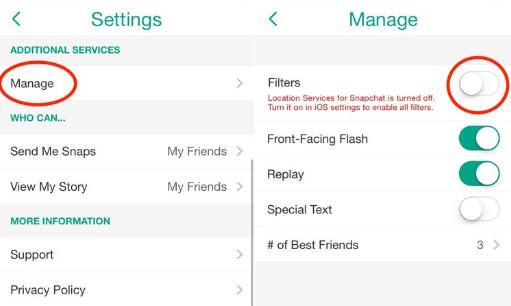
Step 5: To enable or disable location filters for your snaps, toggle the “Filters” switch on or off.
How to Add Location to Snapchat Streak?
Snapchat streaks, a phenomenon highly popular among users, enable two individuals to exchange snaps daily, tracking the growth of their streak. The streak remains unbroken only if both participants contribute equally, with no more than 24 hours passing between the last exchanged snaps. For many dedicated Snapchat users, streaks hold immense significance, and achieving new streak records is a pursuit of their Snapchat journey.
- Create a New Snap
Start by creating a new snap that you intend to send directly to the specific person.
- Access the Sticker Icon
Tap on the “Sticker” icon located at the top-right corner of the screen.
- Choose the Location Icon
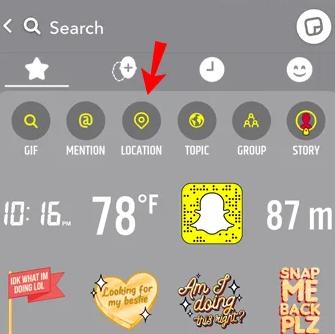
Within the sticker tab, tap on the “Location” icon positioned at the top.
- Select Your Location
A list of available locations will be displayed on your screen. Choose your desired location. If the location is not available, use the search option to find a specific location.
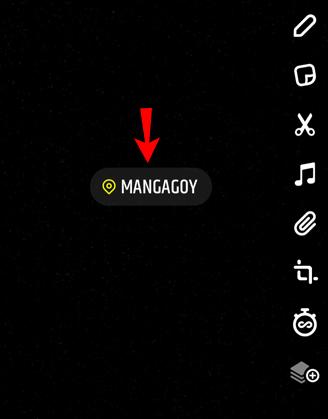
- Place the Location Sticker
A location sticker will now be visible on your snap. Users have the flexibility to move the sticker around and position it on the photo or video, similar to Instagram stories. Modify the appearance of the sticker by tapping on it.
How to Share Location Filters on Snapchat Posts?
Additionally, if you want to share your location with friends on Snapchat, follow these steps:
Step 1: Capture a photo using the Snapchat camera.
Step 2: Swipe left or right to browse different filter options.
Step 3: Look for the location filter displaying your city’s name or a nearby landmark.
Step 4: Tap on the location filter to share your discovery with your friends.
How to Add a Fake Location on Snapchat?
Snapchat uses your phone’s GPS or internet connection to determine your position, which it then adds to the location filter. As a result, unless you utilize a virtual private network (VPN), it is difficult to fake your location on this app.
You won’t need expensive VPNs if you download iFoneTool AnyGo, which can fool the GPS into changing your location. You may feel the need to alter your location due to privacy or safety concerns, or you may simply wish to experiment with fresh geo-filters. It’s free software! Let’s try it easily and safely.
Step 1: Download and install the iFoneTool AnyGo on your computer. Open AnyGo and click the Start button.

Step 2: Connect your phone to your computer by USB, and then you will see your location on the map.

Step 3: Click the location you want to go on the map or enter where you’d like to go on the top left. And then click “Move”.

Now you can get a new fake location! It will also be updated on your phone map.
Conclusion
Adding a location to your Snapchat posts can be a fun way to share your whereabouts with friends and enhance your snaps. Whether you’re using an iPhone or an Android device, the steps provided in this guide will help you easily add a location to your snaps. Remember to respect your privacy and only share your location with people you trust. So go ahead and spice up your Snapchat experience by adding locations to your posts!